
10 years ago, I decided I was going to learn how to play the drums.
As someone with little to no understanding of music and musical instruments, it was a total leap of faith.
Visiting a rickety old music store in my local town in search of a beginner-friendly drum set, I took the first challenging step on my creative journey.
Looking back, taking that leap was the best decision of my life.
I became so passionate about the drums that I decided to pursue it professionally, both as a teacher and as a session musician.
Yet when I first started, learning drums felt like a mountain to climb.
Put simply, I had no idea what to practise.
A quick online search will provide you with access to hundreds of different drumming videos and blogs.
Yet for a beginner trying to learn to play drums, it can feel absolutely overwhelming.
What are rudiments and fills? How do I read drum sheet music? Which drum beats should I learn?
And most importantly, how does any of this relate to playing the music and songs that I love?
I totally understand the feeling of not knowing where to start.
At first, it seemed to me like learning drums was about as easy as rocket science!
Your introduction to learning drums, simplified
This article is designed to give you a step-by-step clear course of action for learning drums online.
There are many blogs out there that cover the different elements of beginner drumming.
But very few tie these elements together in the way that learning drums with a teacher would.
You could think of this article as the blog equivalent of your very first drum lesson.
It’ll be easy to follow and we’ll be covering all the major topics you need to understand as a beginner learning how to play drums.
In fact, by the end of this lesson, you will be able to:
- Play the world’s most popular drum beat.
- Play along to 3 famous songs.
- Write down your ideas for beats in sheet music.
- Hold a drumstick like a professional.
- Practise keeping solid time.
- Understand and talk about drums.
What if I don’t have any drum sticks?
No problem!
I designed the start of this lesson so that it doesn’t require any equipment at all.
I’ve also included a handy guide for what you’ll need if you want to take your drumming further.
You won’t need any equipment to start jamming along to songs and learn about the fundamentals of drumming.
Are you ready to get started?
The whole of this lesson will likely take about 90 minutes to work through, but you’ll be playing your first song in as little as 5 minutes.
You don’t need to do the whole lesson at once, I recommend you start at the beginning and use the menu below to take you to the part of the lesson you got up to last time.
Let’s begin!
How to learn to play the drums
- Develop a clear understanding of rhythm
- Discover which songs you should practice
- Learn how bass and snare interact
- Include 8th notes in your playing
- Practise common drum beats with or without drums
- Understand what drum equipment (if any) you need
- Find out how to hold your sticks properly
- Experiment with your drum grip
- Name the parts of a drum kit
- Recognise and be able to read drum sheet music and tab
- Work on your drum rudiments
- Sharpen up your timing with a metronome
- Figure out drum fills to add variety to your playing
(Skip to any section by using the links above.)
1. To learn to play drums, you must first understand rhythm
What is it that makes a band great?
Let me let you in on a little secret.
Great bands fall apart without great drummers.
As the drummer, you are the beating heart that keeps the music alive.
But with great power comes great responsibility.
As a first-class drummer, you HAVE to play consistently and evenly. You never want to speed up or slow down unless required to.
This makes the music come alive to the ears of the listener. They’ll be able to settle in and listen deeply to what the band is expressing.
The other musicians in your band will follow your lead and together, you’ll create great sounding music.
Understanding tempo
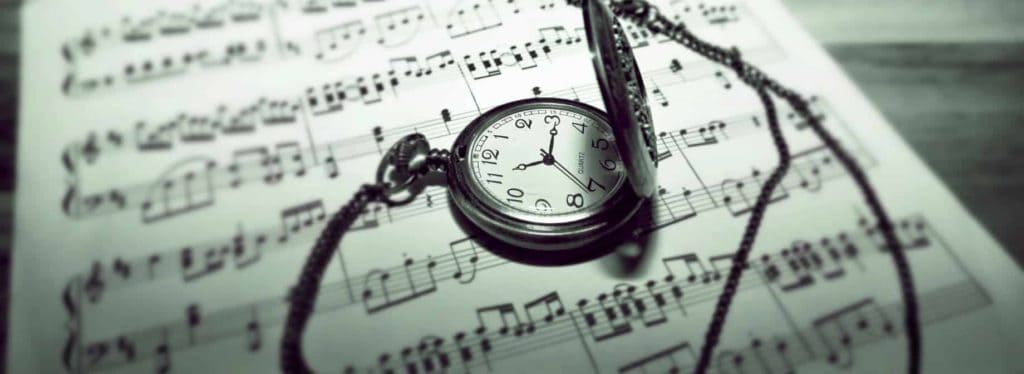
So how can you learn to play the drums consistently and evenly?
To keep great time, you have to understand tempo.
The tempo is a set speed for a song that every band member follows.
After choosing how fast you are going to play the song, it’s your job to stick to this speed (tempo) as closely as possible.
The best drummers are as reliable as clocks. Even when you’re playing your craziest drum solo, you never want to lose that solid tempo that keeps the song moving forward.
As drummers, we actually count the tempo out loud before the song begins.
‘1 2 3 4’!
Why do we count to 4?
Dividing the tempo into groups of 4 beats helps us to know what to play and when.
These groups of 4 give each section of the music a clear structure. This makes it easier to follow the tempo and sound musical.
It’s not the only way that we can count the tempo, but it’s by far the most common.
Once you’ve counted the first ‘1 2 3 4’ out loud, the music begins.
The instruments play as if you were still counting ‘1 2 3 4’ over and over again.
But instead of counting out loud, you’re now going to mark these numbers (known as beats) with drums rather than your voice.
Let’s explore this concept further by jumping straight into our first song!
2. Learning how to play your first beat or song
One song that very clearly marks the tempo of the music with a drum played on every beat is ‘Do I Wanna Know’ by the Arctic Monkeys.
Have a quick listen using the link above before we dive into how this song is played.
Can you hear how the same sounds are repeated again and again? The drummer, Matt Helders, is very clearly marking each beat of the tempo here.
Every time you hear a drum, that’s one beat of music.
But if you listen closely, you’ll hear that there are two different drum sounds.
Every beat, the drummer swaps to the other drum.
3. Introducing the bass and snare
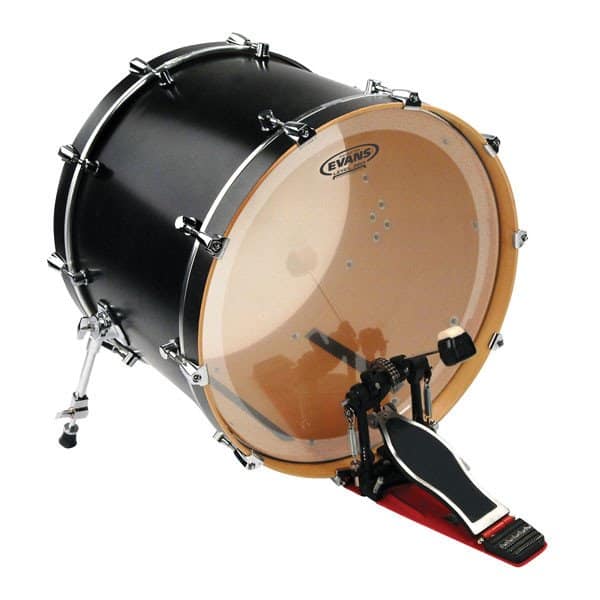
The first drum you hear on the track is the bass drum, followed by the snare drum.
The bass drum is played on beats 1 and 3 and the snare drum is played on beats 2 and 4.
Try this: Count ‘1 2 3 4’ over the music so that you hear the ‘boom’ of the bass drum on 1 and 3 and the ‘snap’ of the snare drum on 2 and 4.
Can you hear how the drums and the counting link up? If you’re not sure how this works, I’ve provided an example in a short explainer video below.
If you think you’ve got it, it’s time to start drumming!
1) Tap your right foot to represent the bass drum.
2) Then tap your left hand on your leg to represent the snare drum.
Tap your right foot on beats 1 and 3, along with the ‘boom’ of the bass drum.
Tap your left hand on beats 2 and 4, along with the ‘snap’ of the snare drum
See if you can tap along to the song and stay in time with the beat. If you’re having trouble with this, don’t worry. Keeping time is a skill that takes several practice sessions to develop.
If you are keeping time, great job! You’ve aced it!
Try this variation: If you are listening through bass-heavy speakers or are wearing headphones, you might be able to hear extremely quiet bass drums played under the snare drums on ‘Do I Wanna Know’.
You don’t have to play these, but if you wanted to have a go at including these, you’d just play a bass drum (right foot) on every beat (1, 2, 3, 4) rather than just on 1 and 3. The snare drum (left hand) would stay the same, being played on the 2 and 4. That means that on beats 2 and 4, you’d play a right foot and a left hand together.
Translating this tapping to the drum kit isn’t too tricky; the right foot and left hand are exactly what you’d use on a drum kit to play this beat.
In no time at all, you’re already playing along to a famous track.
When you’re next listening to your favourite music, listen out for that low ‘thump’ of the bass drum and that high ‘crack’ of the snare drum.
4. Understanding 8th notes and playing your second song
If you feel like you’ve understood what we’ve covered so far in this article, the next step is to look at notes that don’t always fall on the beat.
Like a gymnast jumping between two bars, we use the beats as support, but we can also express ourselves in the space between them.
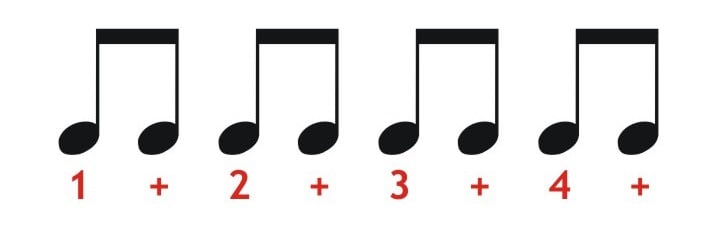
The simplest type of note that appears both on the beat and off the beat is the quaver or 8th note.
If you were to count these out loud, you would count ‘1 and 2 and 3 and 4 and’
Playing these 8th notes on and in-between beats gives you more options to create interesting rhythms and musical patterns.
The drumming from ‘We Will Rock You’ is probably the most famous example of 8th note drumming ever.
Again, have a listen before you find out more about this pattern.
If you were to count the rhythm out loud that is being played, it would sound like this ‘1 and 2, 3 and 4, 1 and 2, 3 and 4)
Note how on this track we don’t play the ‘and’ after 2 and the ‘and’ after 4. We don’t have to play every single 8th note when we want to use them, we can just choose the ones we like!
When we don’t play a note, this quiet space is known as a rest.
All this is very interesting, but I’m ready to play ‘We Will Rock You’!
‘We Will Rock You’ uses a clap to represent the snare drum.
The pattern basically goes like this: bass bass clap. bass bass clap. This follows the count of 1 and 2, 3 and 4.
Now it’s your turn. Hit play on ‘We Will Rock You’ and use your right foot to tap out the bass drum and your hands to clap on beats 2 and 4.
You can probably see how this rhythm is one step up from the first song that we learnt.
As you get better and better, you’ll learn to play incredibly complex rhythms, using all four limbs at the same time.
5. Learning how to play drums with the world’s most popular drum beat
Congratulations on getting this far and understanding a few of the basic elements of drumming.
If you’ve been following along so far, hopefully you’ll feel that learning drums is not as hard as you thought it was!
It’s time to make things a bit trickier now by testing your three-way co-ordination with the most popular drum beat of all time.
Helpful to know: A drum beat is not the same as a beat of music. A drum beat is typically played across many beats and is just another name for a repeated rhythm played on the drums.
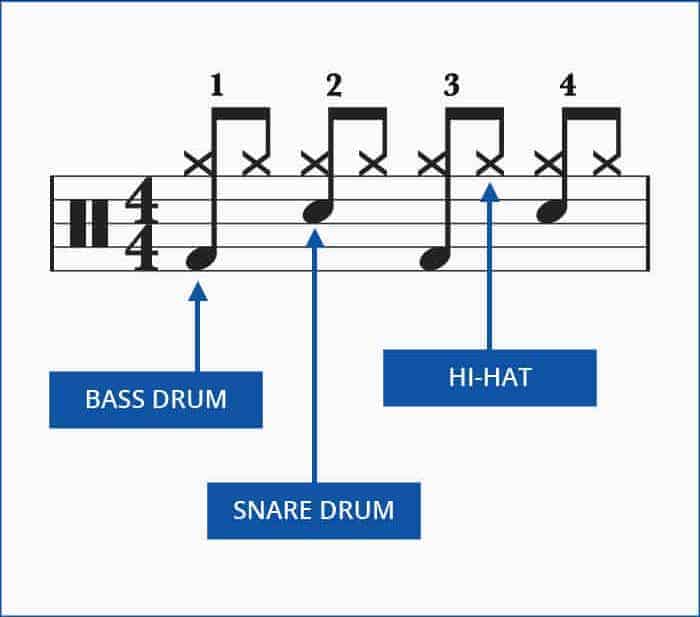
In this next drum beat:
- The right-hand plays constant 8th notes (1 and 2 and 3 and 4 and).
- The left-hand plays on beats 2 and 4.
- The right foot plays on beats 1 and 3.
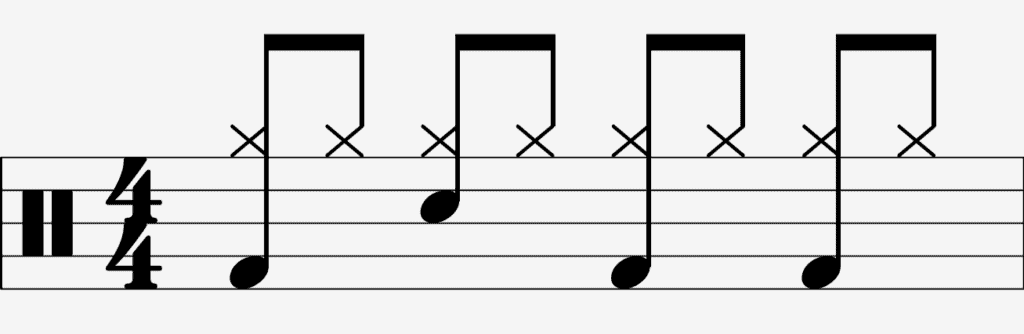
Here’s how it looks visually:
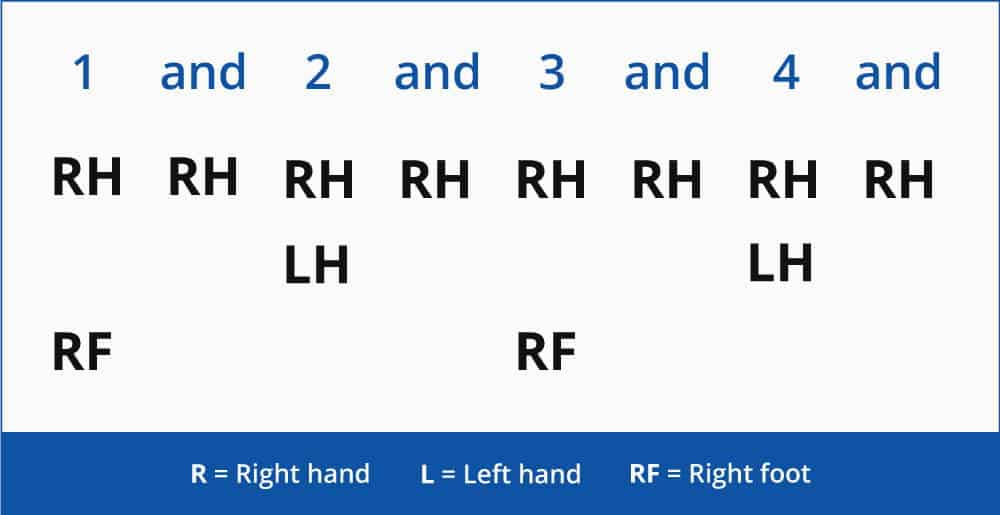
The new addition (the right hand) represents the hi-hat cymbal, which is a key part of most drum beats.
Try this: Start by seeing if you can play 8th notes with your right hand. Simply count ‘1 and 2 and 3 and 4 and’. Every time you say a number or an ‘and’, tap along with your right hand.
The next step is to add the bass drum. While keeping your right hand going, see if you can play a right foot on the 1 and 3.
That means that you’ll play four hi-hats (right hand) for every bass drum (right foot). You’ll be playing a right hand and a right foot at the same time on beats 1 and 3.
This is the start of learning co-ordination, and it’ll probably make your brain ache a little!
If you think you’ve got it, try the hi-hat with just the snare drum. Play your constant 8th notes (1 and 2 and 3 and 4 and) with the right hand and play on beats 2 and 4 with the left hand.
That means that both of your hands will be tapping on beats 2 and 4.
This will probably take some practice while your brain learns these new movements.
Like riding a bike, you have to wobble and crash a few times before you learn how to remain steady.
You can practice this beat along with me by watching and tapping along to the video below.
Bringing it all together
If you think you’ve got that part down, the next step is to try bass, hi-hat and snare all together.
A quick reminder of how that works:
- Right hand (1 and 2 and 3 and 4 and).
- Left hand (Beats 2 and 4).
- Right foot (Beats 1 and 3).
In fact, we’ve made a little demo video for you below.
If you’re starting to get the hang of it, congratulations! You’ve just learnt the most popular drum beat of all time.
This is the most crucial beat in our ‘how to play drums for beginners’ guide.
In fact, becoming comfortable with this beat will take you a long way towards being able to play many thousands of the world’s most popular songs.
This drum beat is the first of 11 crucial drum beats that I recommend all drummers should learn.
Together, these beats provide an extremely solid foundation for your playing. They are the most essential patterns that I use every day as a drummer.
If you’d like some help putting this beat to some world-famous music, you can follow the link here to find out more about my beginner’s drum course, which takes you through everything you need to know about the world’s most useful drum beats.
6. What drum equipment do I need to learn drums online?
I hope the lesson so far has shown you just how much you can achieve in a short space of time if you put your mind to it.
If you’ve enjoyed what we’ve done already and want to get the most out of the next part of the lesson, it’s useful to have some practice equipment.
This doesn’t have to be a full drum kit or electronic drum kit though.
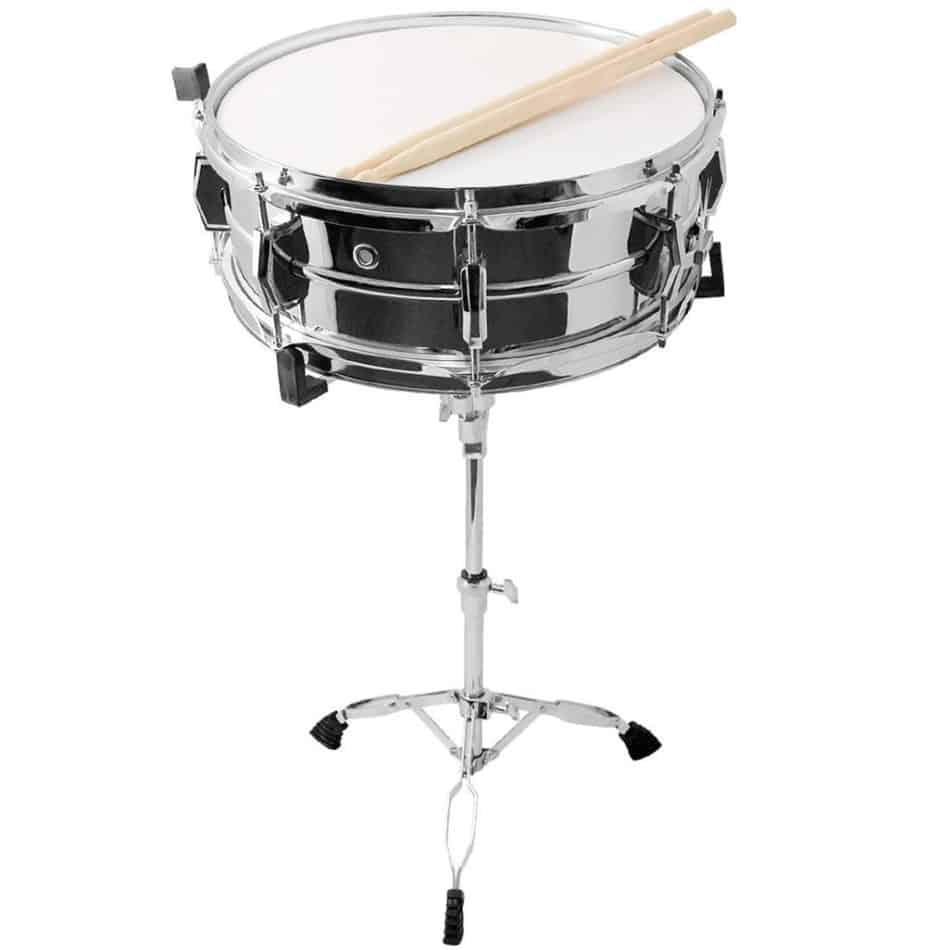
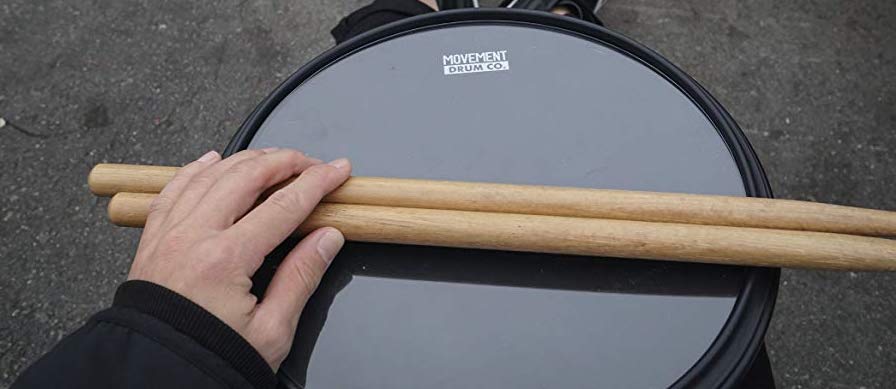
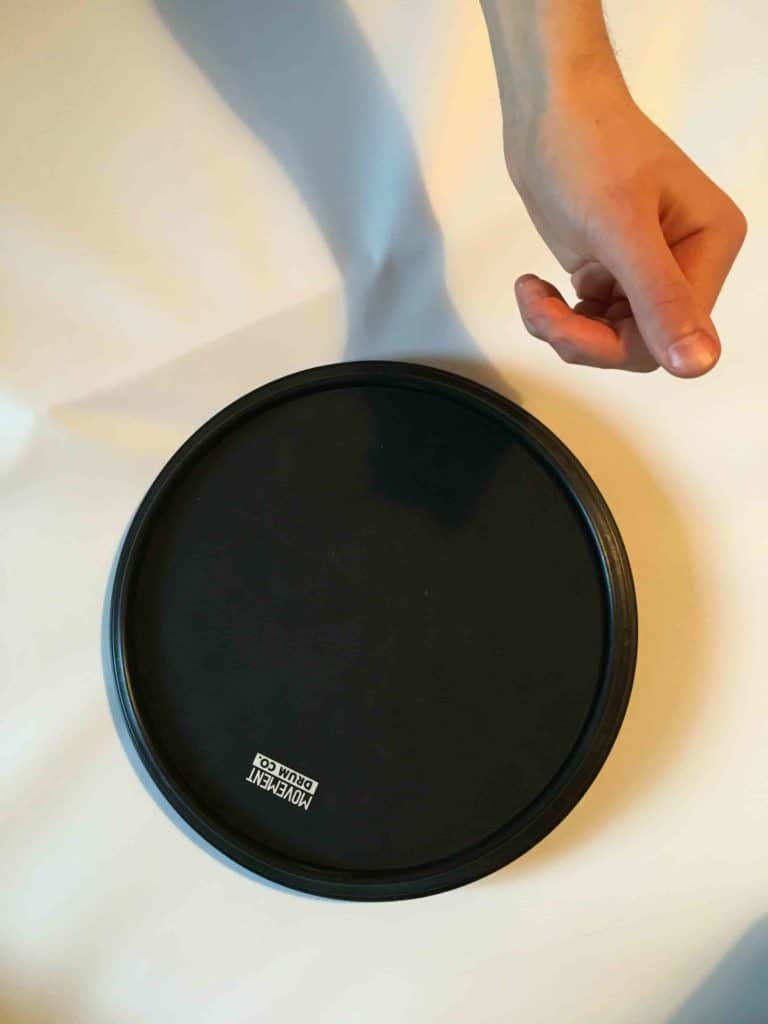
All you need to get started to learn drums online is a good-quality practice pad and some drum sticks.
The practice pad is a quieter way to learn to play drums and develop excellent technique and control before applying it to a full drum kit.
It’s also a cheaper way to see if drumming is right for you and as a result is an ideal way to start your journey as a beginner.
I would personally recommend this 2-in-1 pad and Vic Firth 5A Drumsticks.
Vic Firth is one of the most reputable and trusted names in drumming, so their equipment (e.g. the practice pad above) is of a much higher quality.
This means that you’ll get a more realistic and authentic playing experience, considerably closer to that of an actual drum compared to cheaper products.
Choosing high-quality equipment like this allows you to more easily develop good technique and translate that onto the drum kit at a later date.
You’ll get the most out of the following sections if you have a pad and sticks to hand, but you’re welcome to read along and find out what you’ll be learning first!
7. How to hold drum sticks for beginners
Take a look at this incredible solo from jazz drummer Joe Morello below.
This is what great technique can bring to your drumming.
Holding your drum sticks correctly is an essential part of becoming a truly excellent drummer.
While Joe Morello’s hands appear to be blurring like something out of the Matrix, he always seems relaxed and in control.
Simply put, his technique is perfectly in tune with his body. He only needs to make a small amount of effort for every note that he plays.
So how can I properly learn to hold a drum stick?
While we’ll look at the specific grips that you can use in a minute, there are a couple of key concepts that will really help you get the most out of your technique.
Firstly, and most importantly, relax!
Joe Morello understands this as well as anyone. The more relaxed you can be, the faster you’ll be able to play.
If you tense up, you’ll quickly run out of energy. Continuous tension over the long term is also likely to lead to injury.
Let your body flow.
Learning to play drums in this style leads to:
- A fuller and cleaner drum sound.
- More consistent rhythm and timekeeping.
- A feeling of unwinding and de-stressing.
Try this: As you are playing, use your awareness to feel each of the muscles in your wrists and lower arms. Do they feel loose or tight to you?
Use the bounce
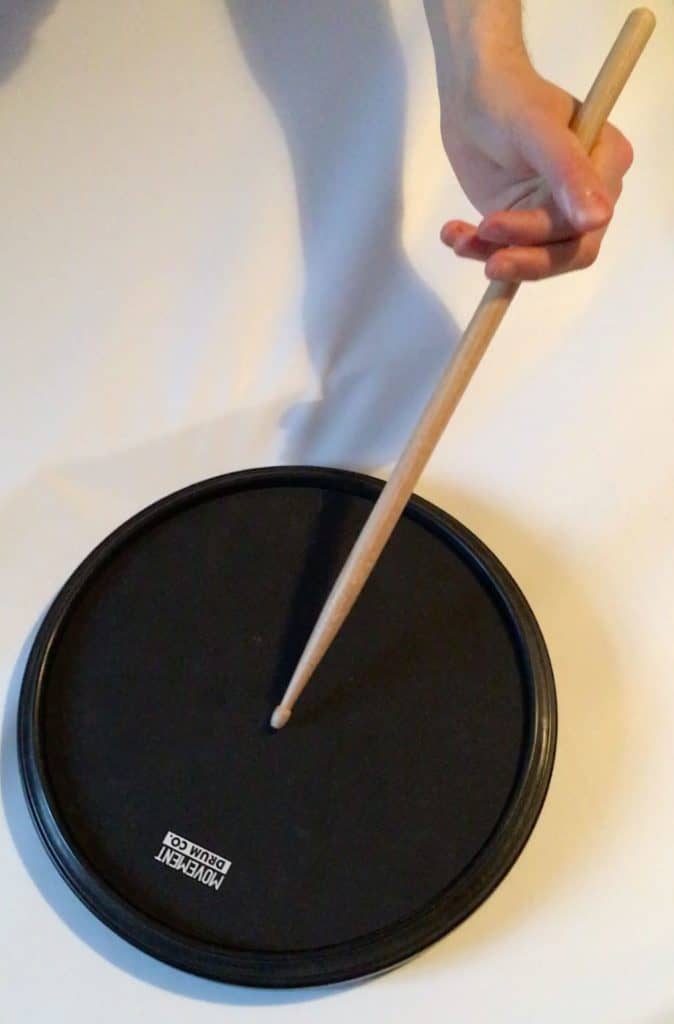
The next trick is to use your drums or pad to help you move the stick.
Try this: Hold your stick very loosely and hit it against your practice pad.
Did you notice how the stick bounced back up towards you? You don’t actually need to lift the stick back up using your fingers, wrist or arm.
By using the natural bounce of the drum or pad, you save a huge amount of energy with every beat that you play.
Eventually, you’ll get so good at this, all you’ll be doing with your hands is controlling the stick as it goes through its natural motion of bouncing off the drum.
Big movements are just for show
Finally, another useful thing to know is that you can play in almost every situation and at almost every volume without having to move much of your upper body.
One of my favourite adverts ever is the Cadbury’s Dairy Milk advert where a gorilla plays ‘In The Air Tonight’ by Phil Collins.
However, if I was teaching this gorilla, I’d definitely have a few pointers for him.
Sticks rarely need to be lifted high off the drums. If you have control over the sticks, you can get more than enough volume with a short, powerful stroke.
There’s nothing wrong with lifting your sticks over your head, but just don’t expect to be able to play faster than the Cadbury’s gorilla!
8. Types of drum grip
The next section is a pretty detailed look at the different drum grips that you can use to play with great technique.
You’re probably going to be exposed to all these drum grips as you learn more and more about drums, so there’s no better time than right now to introduce you to them.
There are a number of different drum grips that professionals use and it’s good to experiment with them and see which you like best.
Don’t feel you have to get bogged down in this section, but simply find one grip you like and take it with you into the next section.
My recommendation would be to start with the Moeller and go from there!
Moeller grip
This is the grip I use most of the time. It provides great control and is extremely comfortable to use once you get the hang of it.
Getting into this grip:
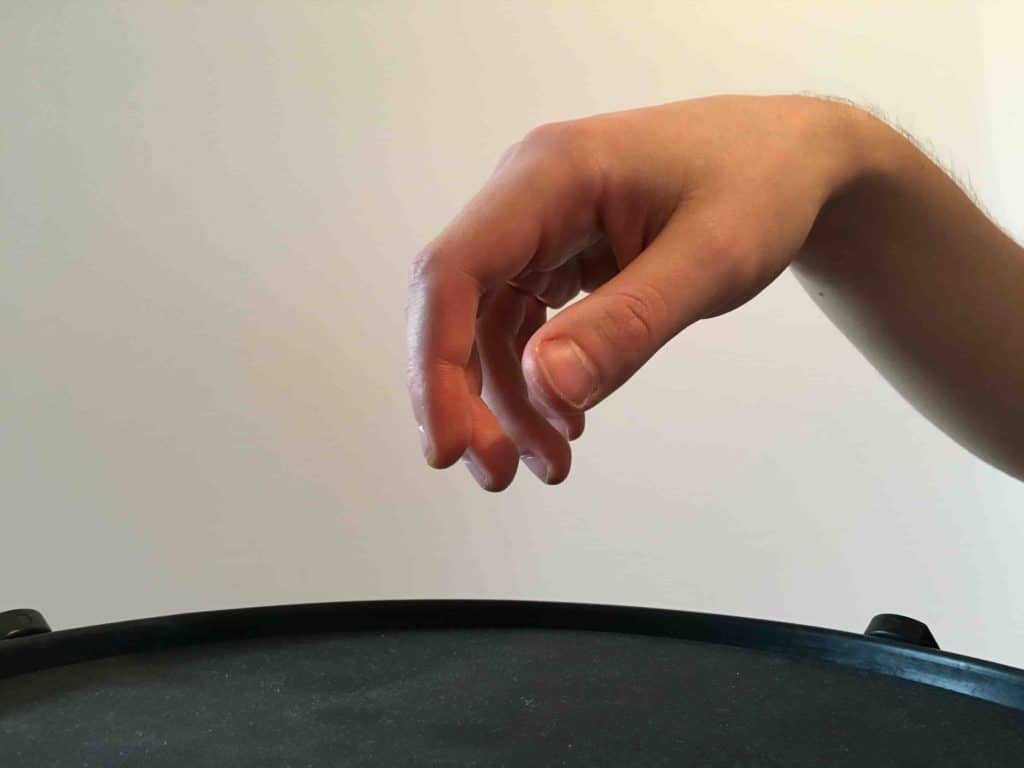
Imagine that you are holding and swinging a tennis racket.
Here’s an example demonstration below.
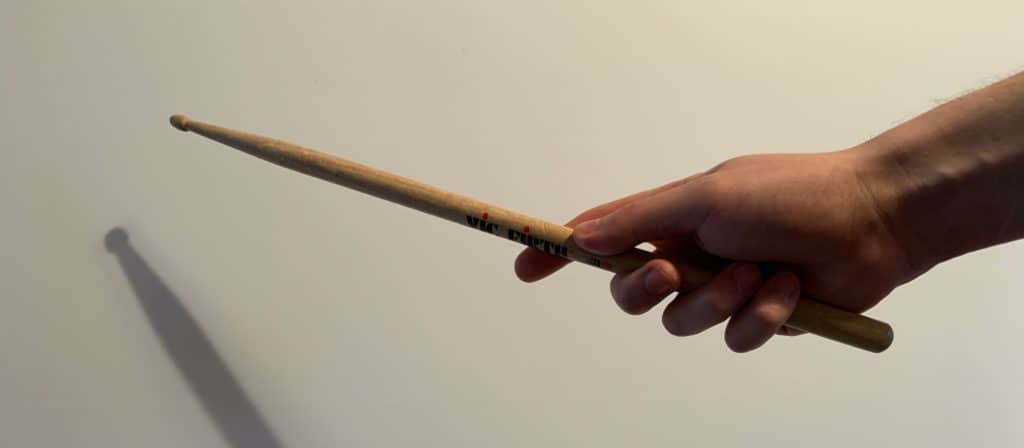
Now, turn your hand over so that the palm of your hand is facing the floor.
See if you can bounce the stick on your drum pad with a relaxed wrist motion without it falling out of your hand.
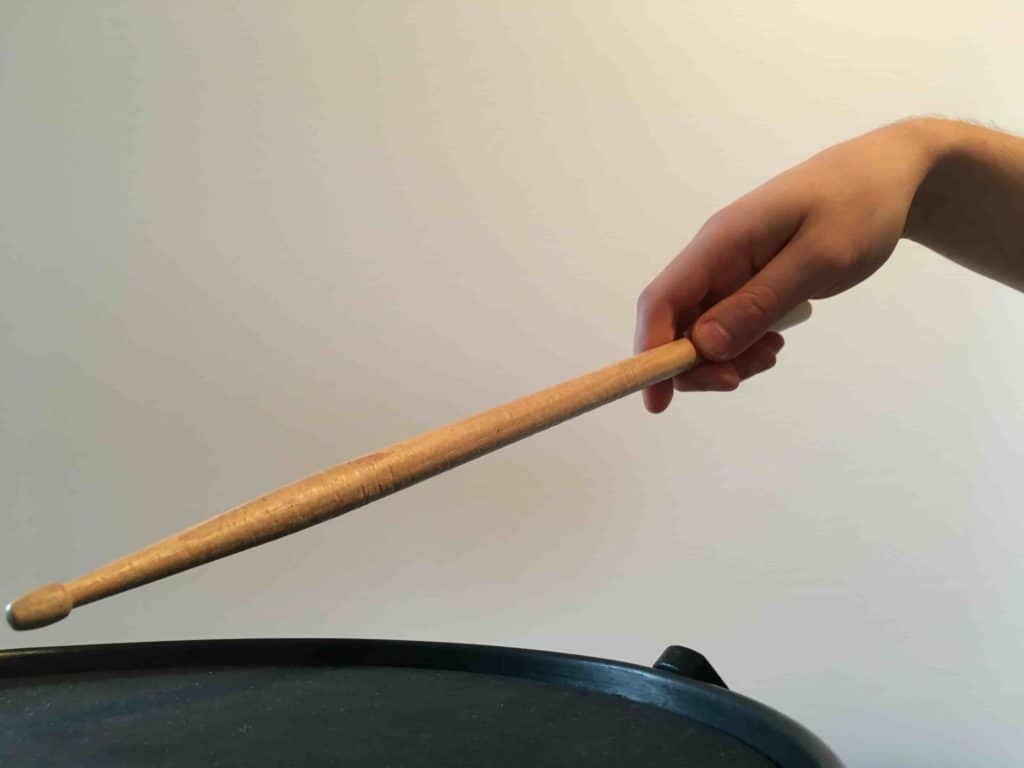
Top tips for this grip:
- Make sure you can see a small amount of the butt end (big end) of the stick poking out from underneath the fleshy part of your hand.
- Tuck your fingers neatly into towards the stick. No fingers should stick out.
- Your first finger should slide forward slightly away from the other fingers.
German grip
The German grip is a fundamental grip used by the vast majority of professional drummers. It’s a classic choice favoured by more traditional teachers.
Getting into this grip:
First, let your hand go floppy in the position shown below.
Then simply insert the stick and gently tighten the fingers.
The stick should sit in-between the first joint of the middle finger and the thumb.
Move your hands into the position shown above.
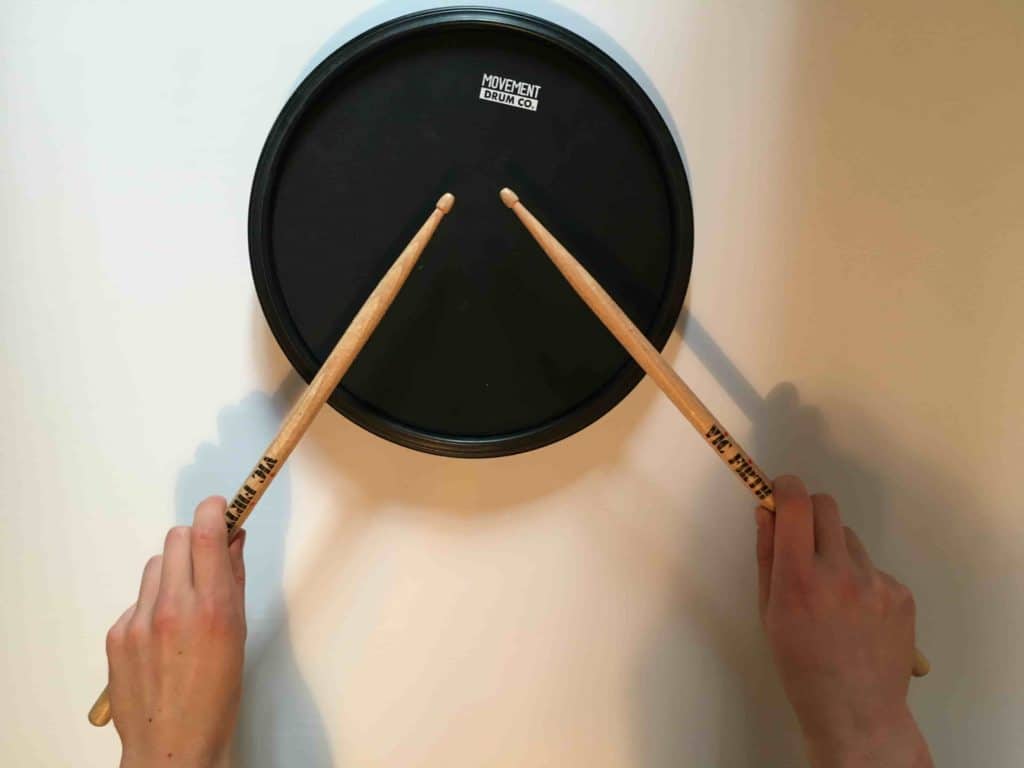
Top tips for this grip:
- Make sure that the tips of your sticks come close together in the centre of the drum or pad.
- The up and down motion of the wrist moves the stick in this grip. Practice this motion and try and relax as much as possible.
- Try and keep the sticks at a 90-degree angle from one another, as shown in the picture above.
French grip
The French grip is favoured by many iconic drummers including Steve Jordan and Jojo Mayer. Your fingers have a larger role in controlling the stick than other grips and for some players this can lead to a greater increase in speed and control.
Getting into this grip:
Starting in the German position, bring your hands together so that your thumbs are facing the ceiling. Looking down, your thumb should be above the first joint of your first finger. This is the ‘fulcrum’ point at which you will be controlling most of the movement of the stick.
There are lots of different ways to move the stick in the french grip.
You can create pressure between your thumb (pushing down) and fingers (pulling up) which will move the stick. The thumb and first finger are the strongest, and typically do most of the work.
You can also use up and down motions of the arm to generate power, and/or you can play with smaller wrist/forearm movements.
These smaller wrist/forearm movements normally have a soft rotation in them: it’s the same movement as when when you turn a key in a lock.
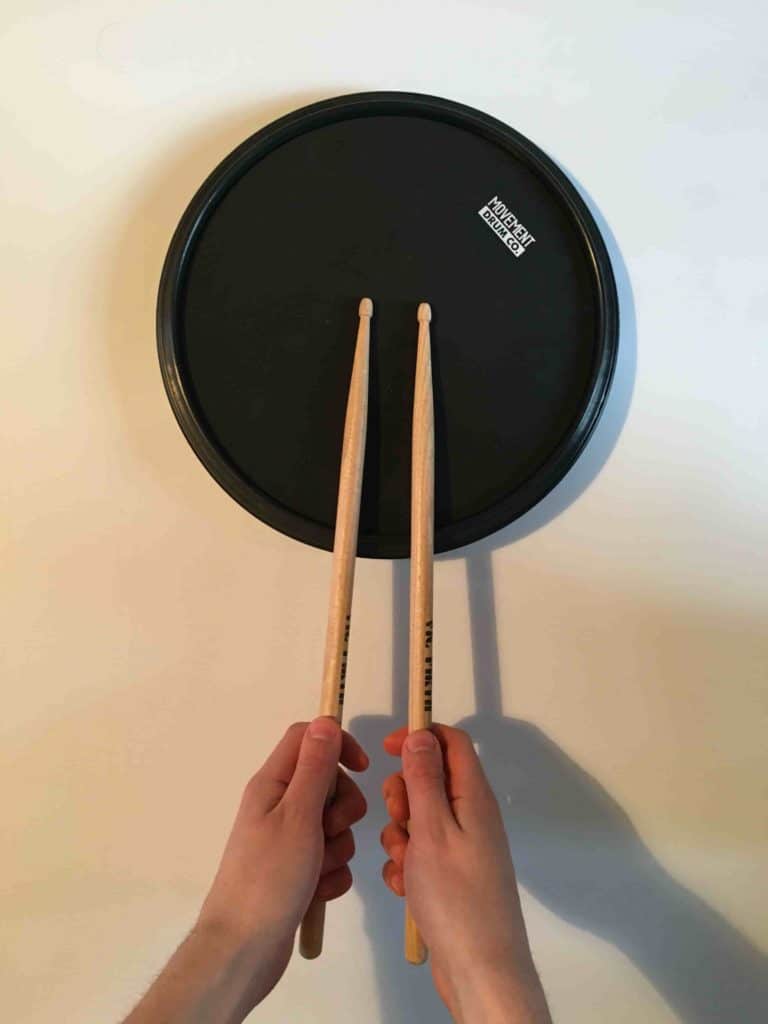
Top tips for this grip:
- Rather than making a V shape like in the German and Moeller grips, the sticks should now be parallel to one another as shown above.
- Experiment with using your other fingers (instead of the first finger) to control the motion of the stick (while still using the thumb on top). You can use them together, or work each finger individually by removing the others from the stick.
- As the wrist is turned sideways and is pointing towards the ceiling, it can be difficult (and painful!) to play with big up and down motions in the wrist. it’s better to use a gentle lock/key rotating motion as described above.
American grip
American grip is a classic ‘middle of the road’ option between German and French grip. It allows you to draw techniques from both German and French styles, making it a great all-round choice.
Getting into this grip:
As it’s such a popular and useful grip, I decided to feature a fantastic video (shown below) which goes into more depth about what makes the American grip different.
It covers how to get into the grip, how to tell it apart from German and French grip and the various techniques that work well for a player using this style.
Top tips for this grip:
- Use your wrists to generate more power and your fingers to control the stick.
- Your fingers should provide support without stopping the stick from moving.
- Practice moving from German to French grip. Can you see how American grip is a mix of the two?
Traditional grip
Our final grip is the traditional grip.
Any grip where both hands are holding the drum sticks in the same way is known as a matched grip.
The traditional grip is the only grip we’re covering where the hands hold the sticks in different positions.
Joe Morello uses this grip in the video at the start of this section and it’s a must learn if you’re a lover of jazz music.
Only the left hand plays a traditional grip, whereas the right hand remains in a grip of your choice.
This is because traditionally, marching drums would hang down to the right, meaning that a different style of grip was required in order to effectively reach the drum.
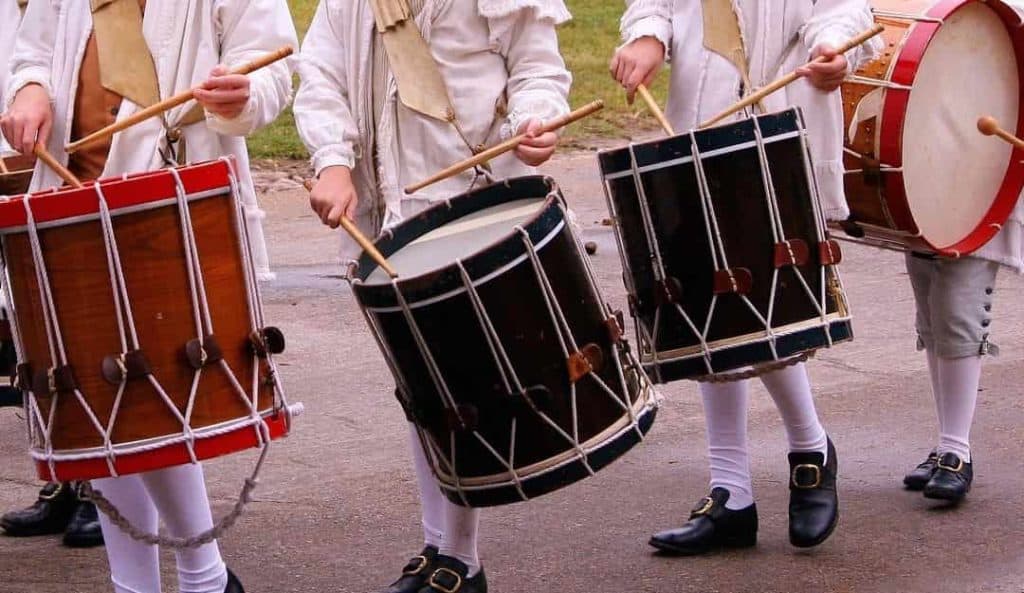
Things have moved on since then and we don’t tilt our drums very much anymore. This gives us more flexibility to play with a wider range of grips with both the right and left hands.
While the traditional grip isn’t necessarily technically better than any of the matched grips, drummers still use it for the sake of tradition and playing like the jazz masters of old.
If you want to look like a professional that knows their stuff, you can dazzle your friends with the traditional grip.
Much of my understanding of the traditional grip is as a result of the masterful Jojo Mayer, so I’d just like to give him a little credit here.
As one of the world’s greatest drummers, I’d highly recommend his DVD ‘Secret Weapons For The Modern Drummer‘ to take your technical understanding further.
Getting into this grip:
Turn your hand up so that the thumb is pointing at the ceiling.
Place the stick between your thumb and first finger, with the stick in the soft part in the middle.
Your first two fingers then sit above the stick, with the first finger pointing inwards. Your ring finger sits underneath the stick and provides control.
Top tips for this grip:
- The stick should not be touching the knuckle bone of the index finger (keep it in the soft part between the thumb and index finger).
- Rotate your forearm to move the stick.
- While your thumb will move, try to keep it posting mostly upwards. Avoid facing your palm upwards towards the sky, as you have rotated too far. Only a small rotational movement is required.
Phew! That was a lot of information for you to take on board.
Don’t feel you have to absorb it all at once. If you’ve found yourself one grip that you like, you can take that with you into the rest of this lesson.
But before we start putting that stick technique to work, we need to learn a little more about the instrument itself.
9. Drum set parts explained
Even if you don’t have a drum kit of your own yet, as a new drummer on the block, you’re going to need to know your way around a drum kit.
Like the people that play them, drum kits come in many shapes and sizes. Luckily, there’s more that makes them similar than different.
Typically, drums come in sets of 5, known as a 5-piece drum set.
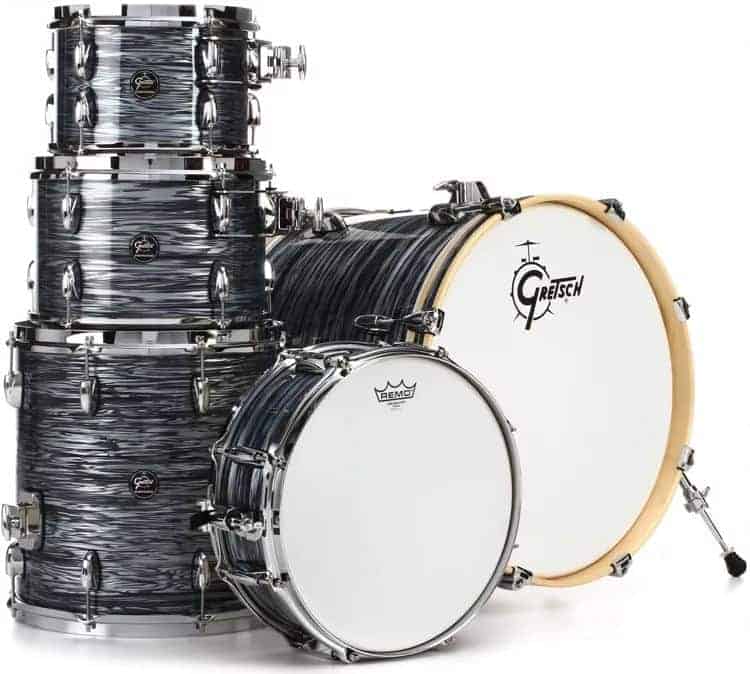
These sets include the following:
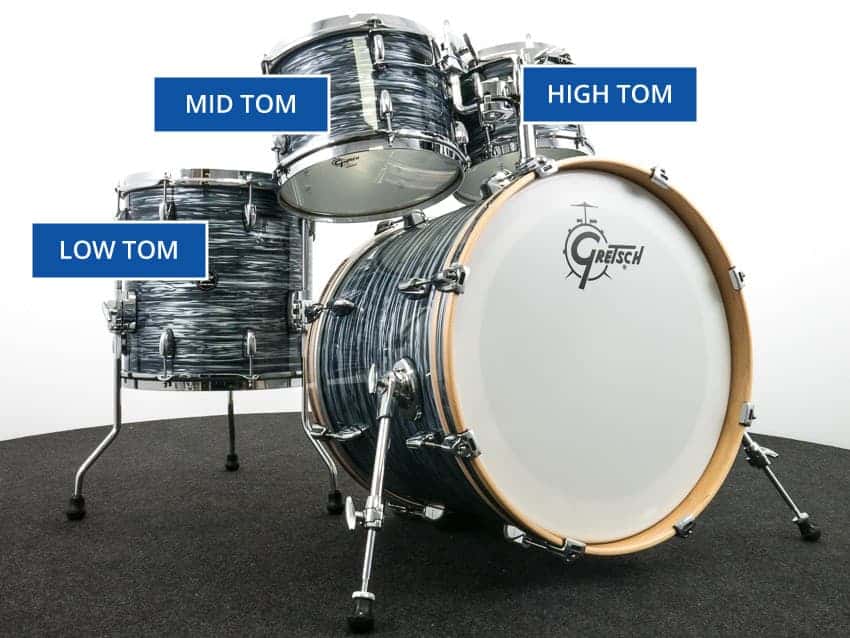
Bass Drum: This sits at the bottom of the drum kit, operated by a foot pedal (also known as the ‘Kick Drum’).

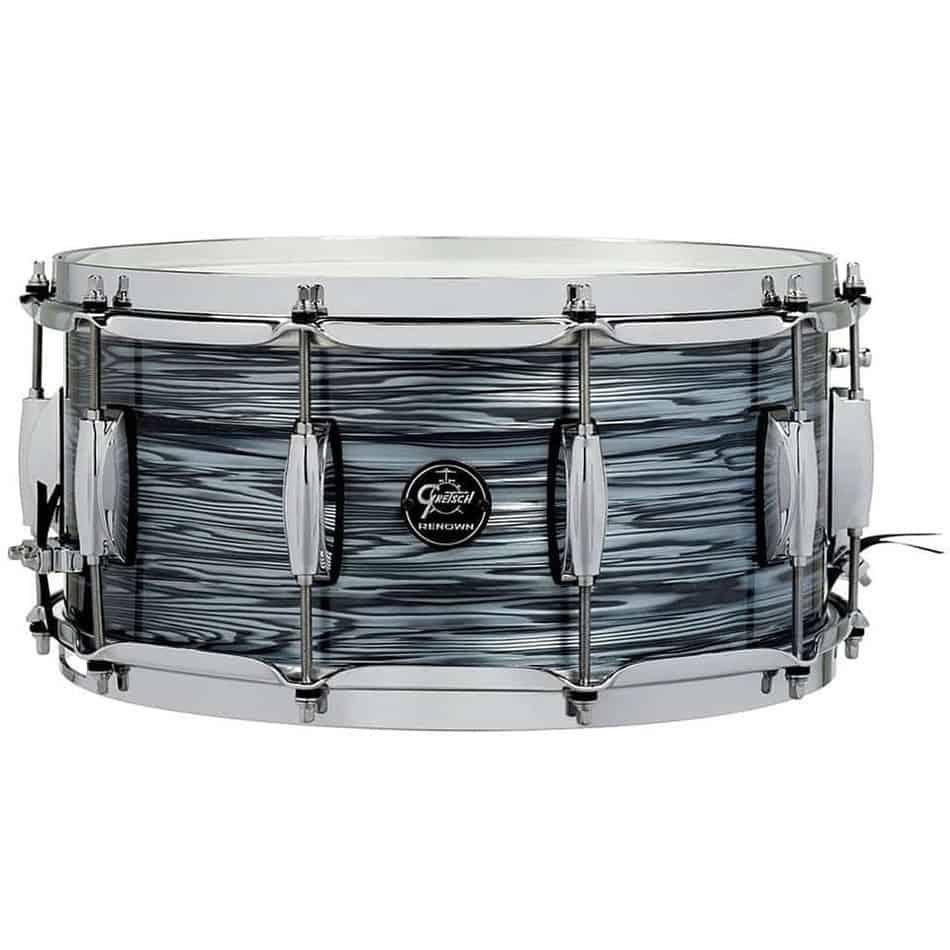
Snare Drum: This sits between the legs of the drummer, normally played with the left hand.
Tom-Toms: The high tom and mid tom sit on top of the bass drum, whereas the low tom is placed to the right of where the drummer sits.
We’ve already covered bass and snare, but what do the tom-toms do?
As cool as the bass and snare are, only moving between two drums could end up sending some older music listeners to sleep.
The tom-toms make your listeners sit up and say to one another: ‘woah, what was that?!’
The high, medium and low toms allow you to add a huge amount of variety and style to your playing.
So named because of their high, medium and low pitch, they are normally played at the end of a section to add variations that catch your audience’s ear.
These variations are known as drum fills, and there’s no better feeling than getting a great drum fill right and hearing everybody cheering!
We’ll cover some drum fills you can play later, using both tom-toms and cymbals.
Which brings us smoothly into our next section…
Cymbals
Once you’ve got your 5-piece kit, you’re going to need some great cymbals to marry with your drums.
Like fine wine paired with a good meal, good cymbals bring out the best in your drumming.
The high tones of the cymbals perfectly complement the low tones of the drums, creating a rich and engaging percussion sound.
There are three main types of cymbals that you’ll need on your kit.
Hi-hat cymbals
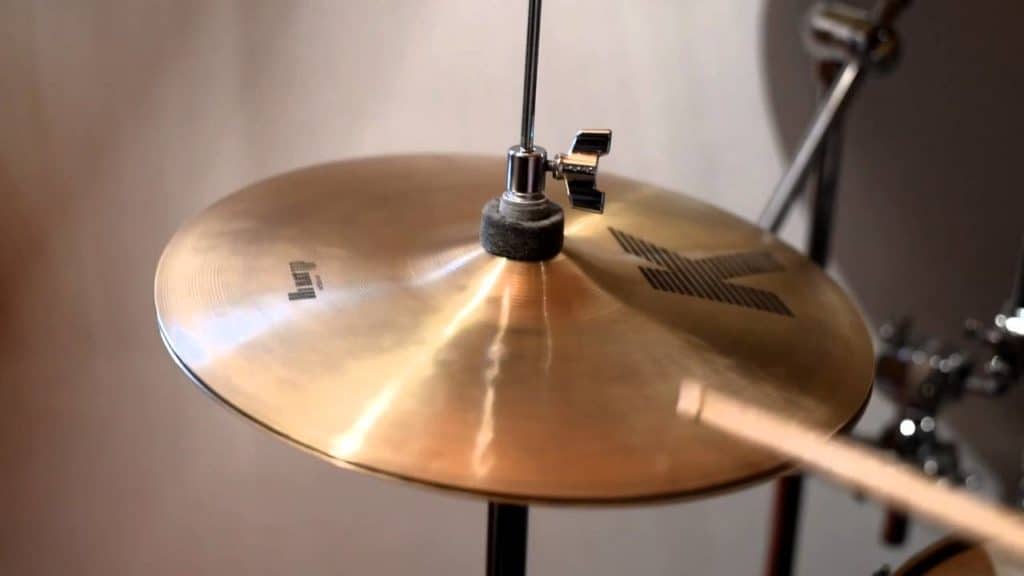
The hi-hat cymbals tie together your bass and snare playing and help the band stay even and consistent.
Using a foot pedal, these cymbals can be held together to create a tight ‘chick’ sound. This is the hi-hat sound that you’d play in ‘Billie Jean’, the third song that I showed you earlier.
The hi-hats can also be opened for exciting drum fills and changing the dynamics of the music (getting louder or softer).
Crash cymbal
Have you ever found a moment on a rock beat or song that you couldn’t resist air drumming to?
A crash cymbal is often used to accent the most important notes in a section of music or melody.
Providing a crisp, shimmering sound, this cymbal is normally played with the bass drum for maximum effect.
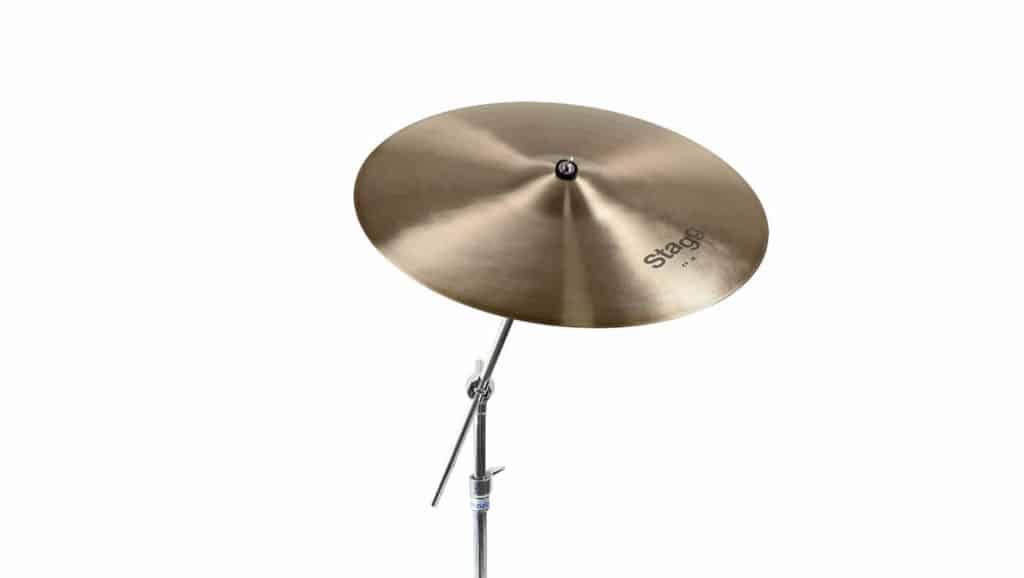
Ride cymbal
The biggest cymbal of them all, the ride cymbal provides a great alternative to the hi-hat for added variety in your drum beats.
Next time you’re listening to one of your favourite songs, see if you can hear when the drummer changes from the hi-hat to the ride cymbal.
You’ll hear the sound of a tight ‘chick’ change to a big washy sound.
Did you know? Drummers often change from the hi-hat cymbal to the ride cymbal when the song changes from verse to chorus.
10. Understanding drum sheet music and drum tabs
Now you know your way around the drum kit, it’s time to unleash your creativity and put your own ideas forward in this section of the lesson.
Using the concepts we’ve learned so far, I’m going to teach you how to read drum sheet music and tablature. This is often the quickest way to learn to play new drum beats.
You’ll be able to write your own ideas for drum beats down and play the ideas of others. In fact, when you become a good drum notation reader, you’ll be able to play drum beats that you’ve never even heard before!
The following is just a basic guide that you can get started with, but if you want to explore this area in more detail, I’ve written a full-length guide to help you gain a deeper understanding of how to read drum sheet music.
Reading drum sheet music
Sheet music normally gives you three pieces of crucial information:
- Which drums and cymbals you should play.
- When you should play them.
- How you should play them.
Let’s have a look at how the drum beat from our third song ‘Billie Jean’ looks in sheet music.
Each drum or cymbal from the drum kit sits on a different line.
Cymbals are marked by crosses rather than notes.
So now you can see which drums and cymbals need to be played, we now need to work out when to play them.
You can see that the music starts with a bass drum and a hi-hat, so that’s where we’ll start.
Let’s ignore the hi-hat for now and just look at the bass drum.
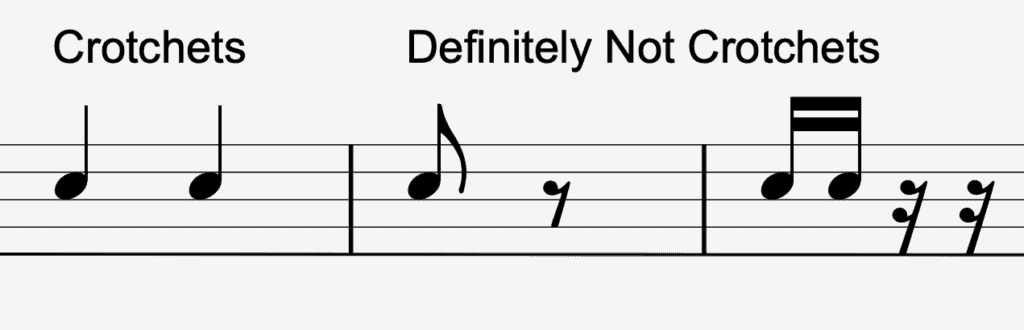
In the example above, the bass drum note lasts for one beat of music, known as a crotchet.
You can identify a crotchet as any black note or cross with a single straight stick attached.
Each section of music always starts on beat 1, so you’ll play the bass drum on beat 1.
After you’ve played the bass drum, the snare drum is up next (ignoring the hi-hat for now).
If you know that the bass drum lasts one whole beat and starts on beat 1, can you guess on which beat the snare drum is played?
The answer is beat 2!
Think of the bass drum as taking up all the space in beat 1. This means you have to wait till beat 2 to play the snare drum.
So if you were to count the first 2 beats out loud (1! 2!) you would play a bass drum on the 1 and a snare drum on the 2. This then repeats in beats 3 and 4.
But what about those pesky hi-hats?
With the hi-hat, you’ll probably be able to see that the shape of the notes is different.
You’ll notice that the hi-hat notes are joined together in a sort of bridge.
These notes are known as quavers and only last half as long as crotchets.
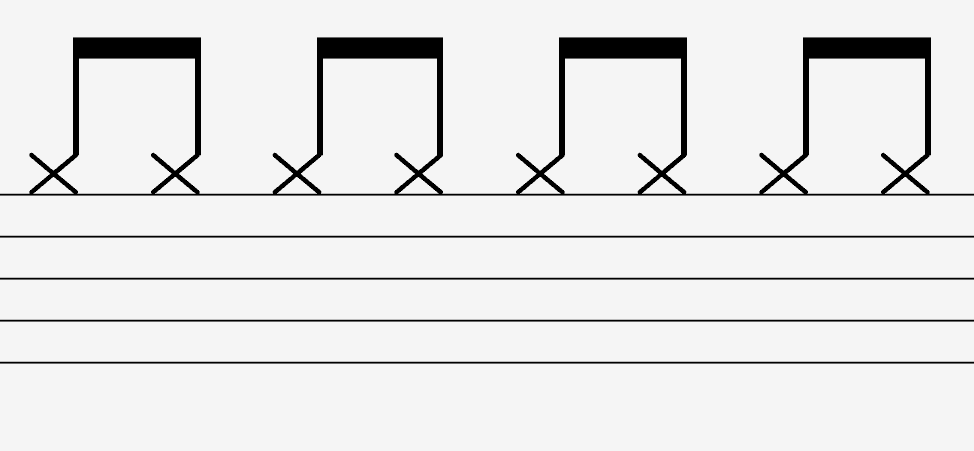
Do you remember how we used counting (1 and 2 and 3 and 4 and) to learn this drum beat in our earlier section?
This is the same way that you will count quavers in sheet music.
In the example above, there is a continuous string of quavers that are played on and between every beat of music.
So you would count the hi-hats as 1 and 2 and 3 and 4 and, as we talked about when first learning Billie Jean.
Think of it like this, in every section, you have 4 beats worth of notes to spend. You decide how much space each note takes up before the next note should be played.
You start on beat 1 and add notes in until you get to 4 beats worth of notes and then go back to beat 1 again by drawing a line to separate the music into sections (known as bars).
But if there are four crotchets and 8 quavers in the example above, doesn’t that equal 8 beats?
You only add up the beats sideways, not vertically. You can play lots of notes together and not exceed your limit of four beats in every bar.
If you’re feeling confused about this section, don’t worry. It can be a tricky concept to get the hang of to start with. Feel free to leave a comment if you have a question or read my drum sheet music guide for more detail.
Dynamic Symbols
Often when reading music, you’ll see a number of letters and symbols written on the page that tell you not just what to play, but HOW to play.
Here’s a common symbol I see regularly in sheet music as a drummer.

This particular symbol is a dynamic symbol, telling you how loudly or softly you should be playing the music.
mf literally means ‘moderately loud’ in Italian.
You won’t always get a symbol like this and will often have to rely on your own musical understanding to play something that’s appropriate.
But that also gives you more freedom to improvise and put your own personal touch on whatever music you’re playing.
So how can I design my own drum beats?
Using what we’ve learnt about sheet music, I’ve got a challenge for you.
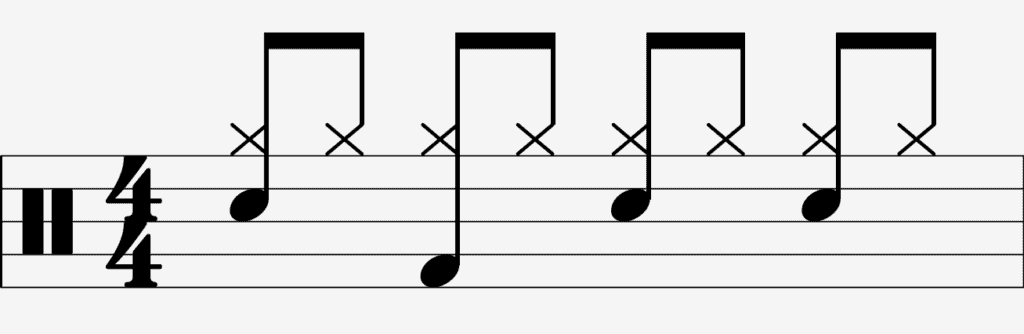
See if you can write down some of your own drum beats by rearranging the bass and snare.
So rather than just having the bass on beats 1 and 3 and the snare on 2 and 4, mix it up a bit!
I’ve made a couple for you below (with sound examples) so you can get an idea of what I’m talking about.
If you’re listening to the sound examples on mobile, use the ‘listen in browser’ option below; you’ll be able to read the article as you listen.
Have a go at writing out a beat on a piece of paper, then see if you can bring it to life by tapping it out like we did with the Billie Jean beat.
You’ve now written your first ever piece of drum music!
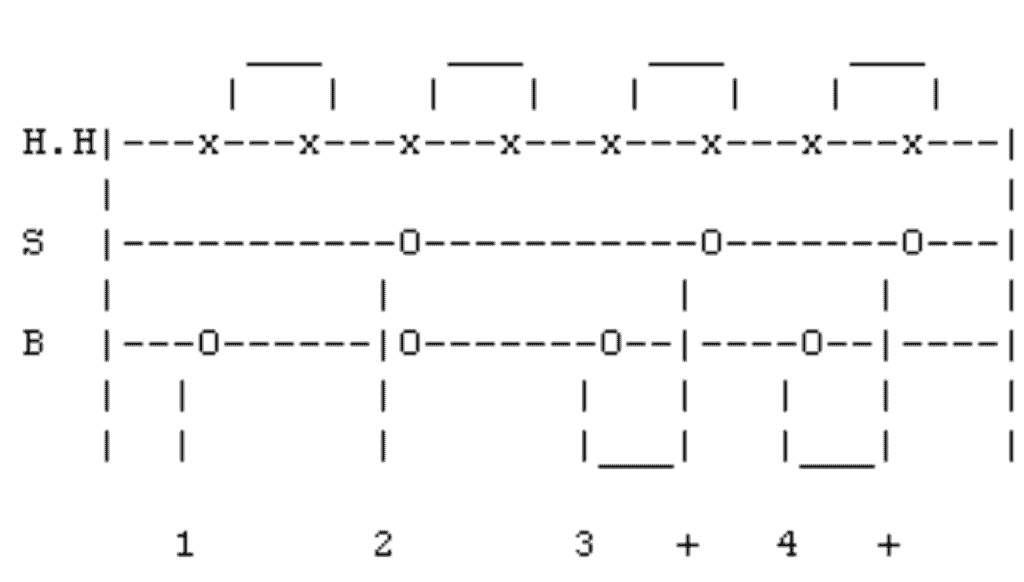
What about drum tab?
If you can read drum sheet music, you can also read drum tab.
Drum tablature is just a way of writing down drum beats quickly.
It often gives less information than sheet music and is just a shorthand so that drummers who are writing down huge amounts of music have time to learn everything.
Here are a couple of examples for you.

However you write out your ideas, you now have the tools that you need to create great sounding beats and express yourself!
11. How to play rudiments
So you’ve learnt some basic drum beats. You’ve played along to some great tracks. You now know how to create and write down some basic drumming ideas.
But there’s another fundamental element to drumming that we simply have to cover.
There are certain patterns in drumming that are absolutely essential.
No matter what music you’re playing, they always seem to turn up again and again.
If you can gain a mastery of these patterns, you’ll be able to play a huge variety of music, produce show-stopping drum solos and easily and effortlessly flow around the drum kit.
These patterns are called rudiments.
Become a speed demon
The first pattern you’re going to want to learn if you want to be able to whizz around the kit at lightning pace is single strokes.
Very simply, single strokes use both hands to increase the speed at which you can play.
It’s the simplest pattern in the whole of drumming.
Play one note with your right hand, followed by one note with your left hand.
While this is very easy to begin with, as you increase the speed, keeping this even and balanced becomes much trickier.
You want both drum sticks to make the same sound as they hit the pad or drum. Each note you play should be roughly the same volume.
Then, when you’re feeling comfortable, see if you can make the first of every four notes a little bit louder (like in the video above). These louder notes are known as accents.
When the sticks start blurring in front of your eyes, you’re crushing this!
We’ll look at the best way to practice these rudiments in the next section.
Keep on rollin’
The next simple rudiment that is a game-changer for drummers is the double stroke.
It’s dead easy to start with, but as you try to get it faster and smoother, you’ll have to develop your muscle memory through regular practice sessions.
The pattern is now two notes with your right hand, followed by two notes with your left hand.
Why is this useful?
Because even when playing two notes with each hand, you only really need one wrist movement. You can rely on the bounce that we discussed earlier in the stick section to provide the height you need for the second note.
This means you can dramatically increase your speed and as a result, the double stroke is a classic choice for playing fast and highly demanding sections of music.
Playing several notes with each hand gives the other hand time to move to other drums to play more complex and intricate rhythms.
Mix it up
It wasn’t long before us drummers got bored of the single and double strokes and started to see how much further we could take things.
As it turns out, there’s a whole world of rudiments out there.
There are 40 standard accepted rudiments but there are hundreds of variations.
You can even create your own.
I’ll show you one final rudiment in this section and then we’ll look at the best way to practice these and to put them into action with real drum fills.
The final rudiment we’ll be exploring is the paradiddle.
The what?
The paradiddle!
Huh?
It’s a crazy name, but it comes from the way that teachers explain the pattern to their students. If you were to sing this rudiment out loud, pa – ra- did – dle is probably close to the sounds you would end up with.
The pattern is as follows.
Right Hand Left Hand Right Hand Right Hand
It then reverses:
Left Hand Right Hand Left Hand Left Hand
Did you spot this? The eagle-eyed among you will have noticed that the paradiddle is two single strokes followed by two double strokes. The other half of the paradiddle is a mirror image of the first.
This makes 8 notes in total that together complete the paradiddle.
This rudiment is fantastic for explosive drum fills around the kit, delicate hi-hat and snare interplay and fancy variations.
Now let’s take these rudiments, practice them and put them in a musical context.
12. Practise with a metronome
To get the hang of these rudiments (or any element of drumming), the metronome is going to be your best friend.
You can get a metronome as an app on your phone or computer and this will help you stay in time as you practice.
We’ve done a lot of talking about beats of music in this article.
Put simply, the metronome plays the beats on your behalf. It helps you to keep perfect time with a series of clicks.
This allows you to find out whether your drumming is even, consistent and ready to take to the stage.
If you’re not sure which metronome to get, you can start by using any free online metronome (just search ‘online metronome’ and you’ll find lots of options).
Challenge #1
Set your metronome to 80 bpm. On every click, play one note on your pad or drum kit.
Start with single strokes first.
See if you can anticipate when the next click will come so that you and the metronome are playing together in the same way that musicians would.
This is the first challenge in our metronome challenge video, which you can check out below.
If you’re unsure about how any of these exercises are meant to sound, I’ve provided an example of each in the video below.
Once you have an idea of how they are meant to sound, see if you can practice each one by yourself using an online metronome.
Take your time with each exercise: there’s no need to rush through them. The below example is just a quick demonstration of all 3 exercises.
Just so you know: Playing to a metronome is hard! It takes practice for us to develop the timing skills required, so don’t be too harsh on yourself!
Challenge #2
Now see if you can play quavers along to the metronome, like in the video above.
This means that you’ll play two notes for every beat, meaning that one out of every two notes will fall in the space between the metronome.
See if you can play the 3 rudiments we’ve covered as quavers. Move between the single strokes, double strokes and paradiddles as you feel more comfortable.
Challenge #3
If you’re going to play a classic drum fill, chances are it will involve semiquavers. These are twice as fast as quavers, meaning that there are four notes for every beat.
See if you can play the 3 rudiments as semiquavers along to a metronome. You can count this rhythm as:
‘1 e and a’ ‘2 e and a’ ‘3 e and a’ ‘4 e and a’
If you’re feeling like you understand how these rudiments work, it’s time to put them to work in the concluding part of our drum lesson.
It all been leading up to this, the grand finale of our how to learn drums guide.
13. Playing drum fills
Every student who wants to learn how to play drums as a beginner should get a handle on some basic drum fills.
Drum fills sprinkle a bit of additional magic on top of our regular drum beats, often becoming some of the most memorable moments from famous songs.
There’s a reason that the Cadbury’s Dairy Milk advert chose to feature their gorilla playing ‘In The Air Tonight’.
The drums open with that iconic drum fill that everybody knows and remembers.
What I’m going to show you next is how to add the finishing touch of a drum fill to your regular drum beat.
It’ll be the icing on the cake to a great piece of drumming.
Drum fill #1
Do you remember the drum beat from Billie Jean that we looked at earlier?
We’re going to play the drum beat three times over, but on the 4th time round, we’re going to do something a bit different.
Here’s how it looks in music:
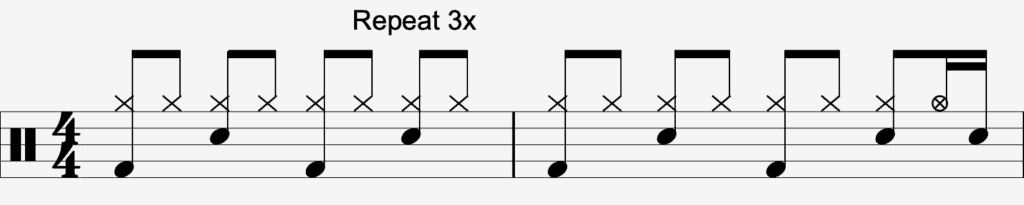
And here’s how this new variation sounds.
Those two quick notes at the end are an open hi-hat and a snare drum.
You can hear these notes in the drum fill at 1:09 in the Billie Jean video.
On the ‘and’ of beat 4, rather than just playing a hi-hat, we play an open hi-hat, followed by a quick snare drum on the ‘a’ of 4.
If you were to play this on your drum pad, you would count it out loud as ‘4 and a’.
Here’s what it looks like on the pad.
This is a great snappy little variation to learn as your first drum fill.
When you’ve practiced this on the pad, it’s not too difficult to transfer on to a real drum kit. You don’t have to open the hi-hat to still produce a great sounding fill.
Drum fill #2
But before that, let’s give you one more great fill that can be used in a wide variety of musical situations.
The fill is much longer than the first and will draw more attention to you as the drummer. It’ll help you stand out and provide a real contrast in the music.
This fill uses the paradiddle rudiment. Here’s how it looks in sheet music.

And here’s how it sounds.
Finally, here’s what it looks like on the pad.
In the last bar (the bar with the drum fill) beats 3 and 4 are completely taken up with the paradiddle. The right hand plays on the hi-hat, whereas the left hand plays on the snare.
The paradiddle is played as semiquavers, with four notes for every beat.
And the most exciting bit is – learning the paradiddle doesn’t just give you access to one drum fill.
Once you’ve learned a new rudiment or pattern you can apply them to the drum set in endless combinations, depending on which drums you choose to play.
We often learn patterns on the pad, get them up to scratch, and then unleash them on the drum set.
Conclusion and next steps
I hope you’ve enjoyed this ‘how to play drums for beginners’ guide.
There’s really nothing stopping you from becoming a truly creative, unique and inspired drummer.
I’ve thrown lots of information at you and congratulations for jumping in and hopefully learning something new!
If you’ve been inspired by what you’ve learnt today, you may be wondering, ‘where do I go from here?’
To help new drummers get started, I’ve created a drumming survival course that teaches you everything you need to know as a new drummer.
You can find out more about the course by following the link here.
I hope that just a little bit of my passion for drumming has rubbed off on you after reading this article, and hope you’ll be inspired to discover your musical gifts and all the amazing things that you’re capable of.